
With single sign-on, your team signs in to the Attic Partner Portal with their own Microsoft account. You connect your Microsoft Entra tenant to the portal once. After that, you control in Entra who has access and with which role, and you can switch off password sign-in.
What you need
- An account with the Admin role in the Attic Partner Portal.
- A Global Administrator or Cloud Application Administrator in your Microsoft Entra tenant. If that is not you, you can forward the consent link to someone who is (see step 2).
Part 1 — Connect your Microsoft tenant
Step 1 — Open Single sign-on
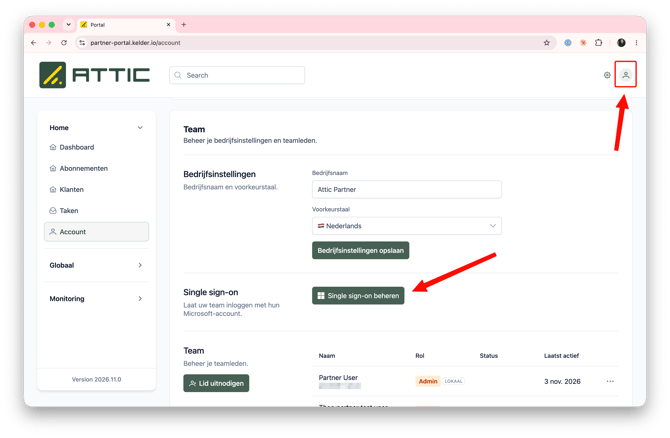
Click the user icon in the top right to go to Account. Under Single sign-on, click Manage single sign-on.
Step 2 — Start the connection
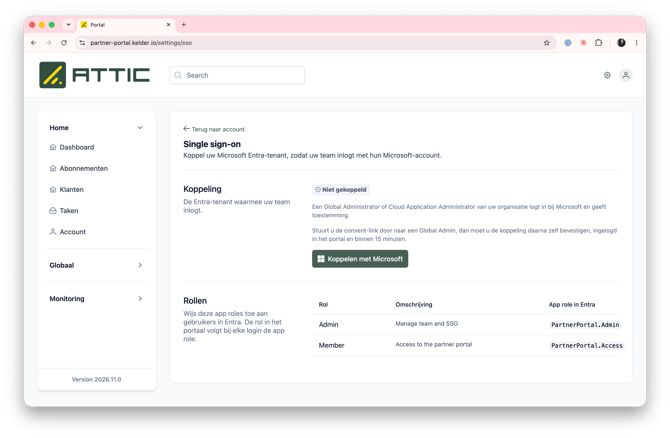
The status shows Not connected. Click Connect with Microsoft.
Not a Global Admin? Forward the consent link to a Global Admin. Then confirm the connection yourself, signed in to the portal, within 15 minutes.
Step 3 — Sign in to Microsoft
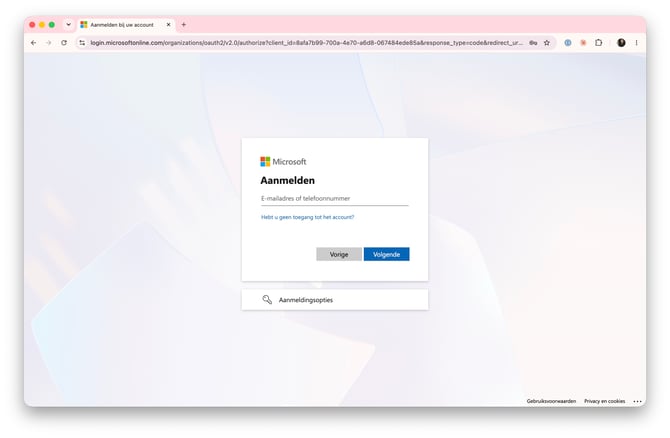
Sign in with the Microsoft account of a Global Administrator or Cloud Application Administrator in your organisation.
Step 4 — Consent on behalf of your organisation
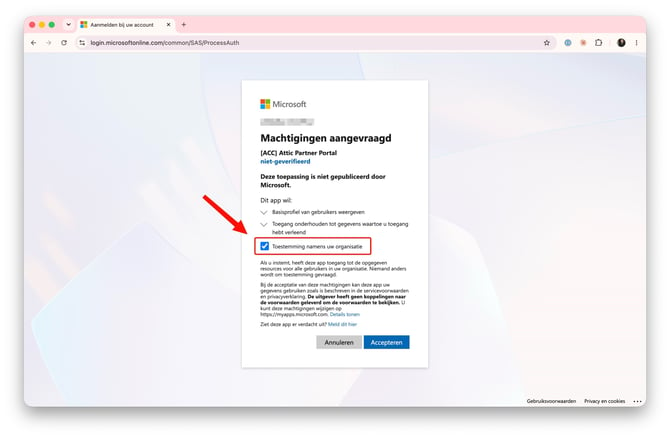
Microsoft asks for permissions for the Attic Partner Portal app. Tick Consent on behalf of your organization and click Accept. Without this box, every user would have to give consent individually.
Step 5 — Confirm the connection
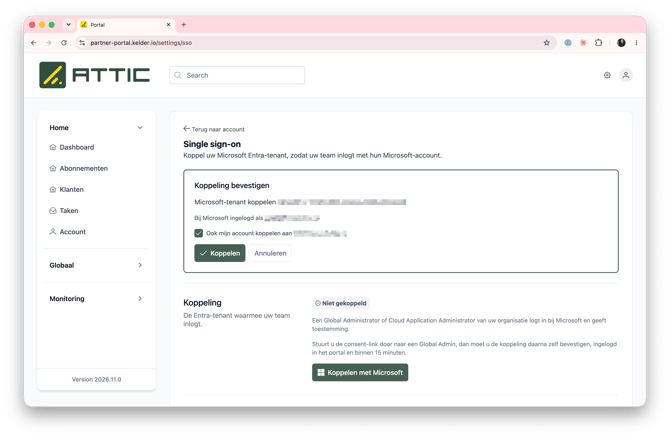
You are returned to the portal. Check the tenant ID under Confirm connection. Keep Also link my account to … ticked, so your own portal account is linked to your Microsoft account. Click Connect.
Step 6 — Your tenant is connected
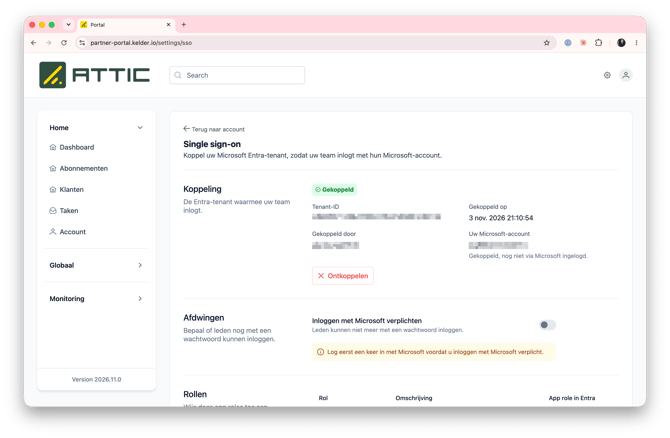
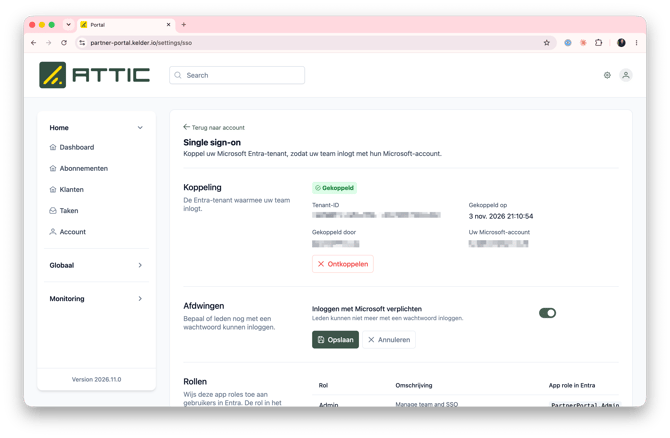
The status now shows Connected, with the tenant ID, who connected it and when. You can only require Microsoft sign-in after you have signed in with Microsoft yourself once.
Part 2 — Sign in with Microsoft and enforce it
Step 7 — Sign in with Microsoft
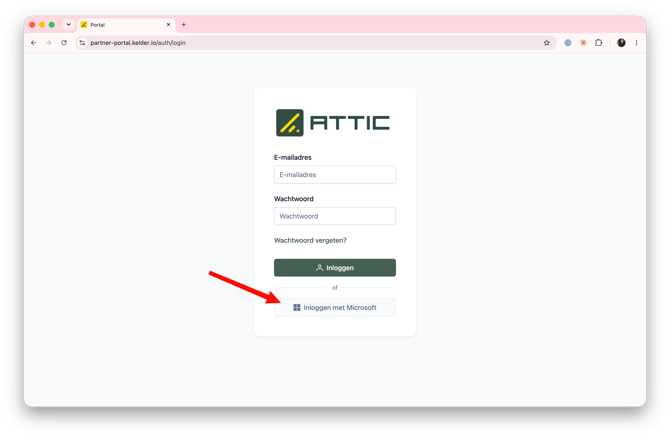
Sign out and sign back in using Sign in with Microsoft.
Step 8 — Check your account
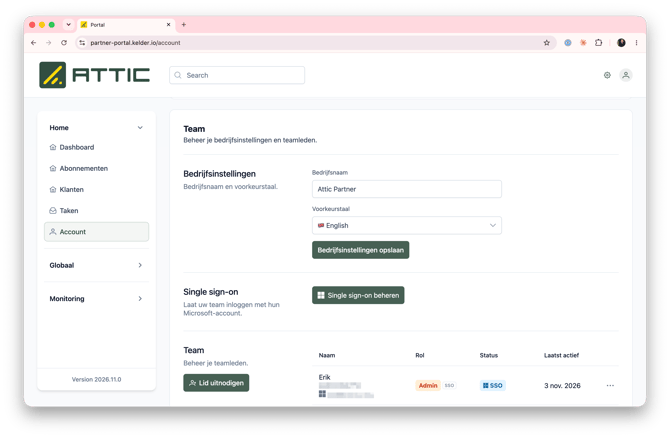
Go to Account. In the team overview, your name now carries the SSO label.
Step 9 — Require Microsoft sign-in (optional)
Go back to Manage single sign-on. Under Enforce, switch on Require sign-in with Microsoft and click Save. Team members can no longer sign in with a password.
Tip: assign the roles in Entra first (part 3), so nobody gets locked out once you enforce SSO.
Part 3 — Assign users and roles in Microsoft Entra
Step 10 — Open the app in Microsoft Entra
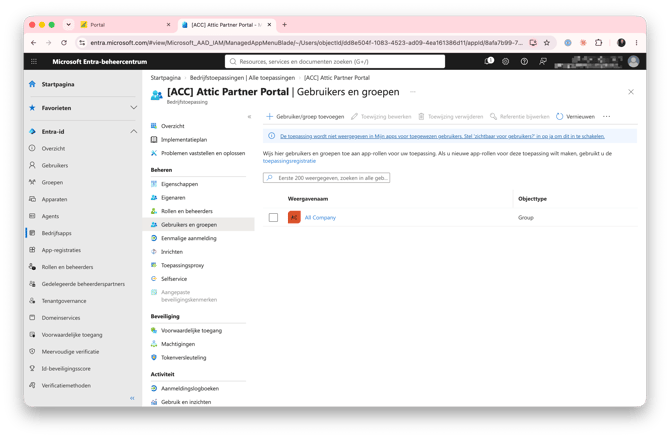
In the Microsoft Entra admin center, go to Entra ID › Enterprise apps and open Attic Partner Portal. Select Users and groups and click Add user/group.
Step 11 — Choose users or a group
Under Users and groups, select the users or the group that should get access. Note: only direct members of a group get access, nested groups do not. Then click Select a role.
Step 12 — Choose the role and assign
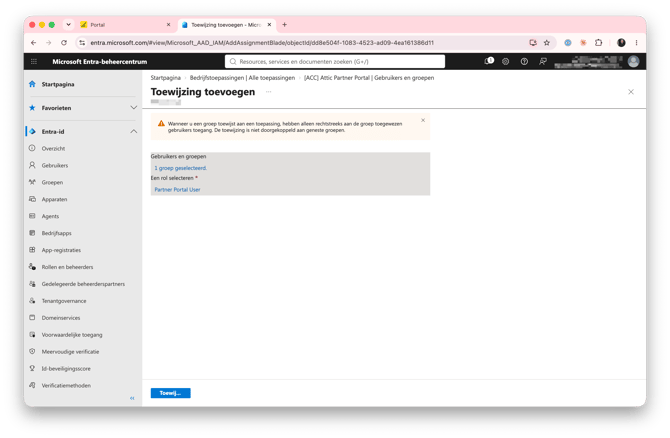
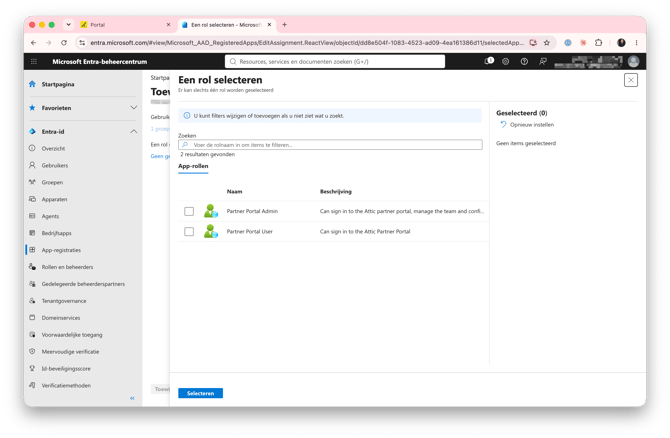
Choose Partner Portal Admin (manage the team and SSO) or Partner Portal User (access to the portal). Click Select, then Assign. The role in the portal follows the Entra role at every sign-in. To assign both admins and users, repeat steps 10–12 for each role.
Done
Your team now signs in with their Microsoft account. Give new colleagues access by assigning them to the app in Entra; anyone you remove there can no longer sign in. To disconnect, use Disconnect on the Single sign-on page.